
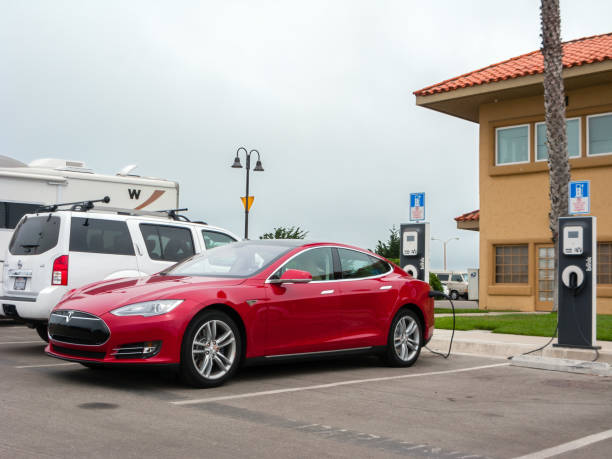
Electric vehicles are becoming more common across Tampa. As more homeowners switch to EVs, home charging is no longer a luxury—it is a practical need. Public charging stations can help, but they are not always convenient. That is why many Tesla owners choose to install a dedicated home charger.
The Tesla Wall Connector is one of the most popular options. It offers fast, reliable charging right from your garage or driveway. Compared to a standard outlet, it can charge your vehicle much faster. This makes daily driving easier and more predictable.
In Tampa, many homes are well-suited for EV charger installation. However, the final setup depends on your electrical system, panel capacity, and where you want the charger installed. Some homes may need minor upgrades, while others are ready for installation right away.
Another reason homeowners invest in a Wall Connector is convenience. You can plug in your car overnight and wake up to a full charge. There is no need to wait at public stations or adjust your schedule. Over time, this saves both time and effort.
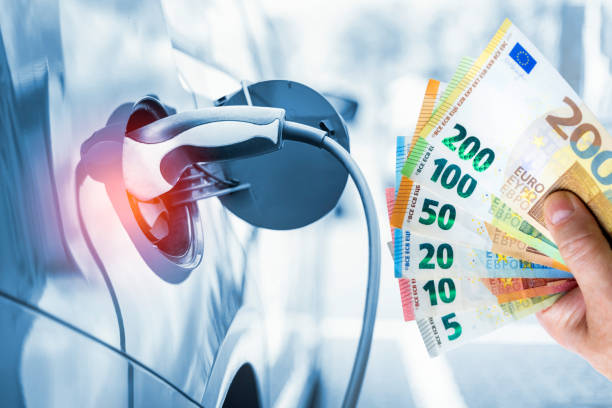
Cost is often the first question people ask. While prices vary, most Tampa homeowners spend between $1,000 and $3,500 for a complete installation. The final cost depends on several factors, including labor, materials, and any electrical upgrades.
In the sections ahead, we will break down these costs in detail. This will help you understand what to expect and how to plan your installation with confidence.
Average Tesla Wall Connector Installation Cost in Tampa, FL
The cost of installing a Tesla Wall Connector in Tampa can vary, but there are clear patterns. Most projects fall within a predictable range, especially when handled by a licensed electrician.
Typical Cost Range for Tampa Homes
For most homes in Tampa, the total installation cost falls between $1,000 and $3,500. This includes both the charger and the installation work.
A simple installation, where the charger is placed close to the electrical panel, is usually on the lower end. These projects often cost between $950 and $1,500. They require less wiring and minimal labor.
On the other hand, more complex installations can cost $2,500 or more. This happens when the charger is far from the panel or when the electrical system needs upgrades. Older homes in Tampa often fall into this category.
It is also important to consider that every home is different. Even two houses on the same street can have very different installation costs. That is why a professional assessment is always recommended before starting the project.
Cost Breakdown (Equipment + Installation)
To better understand the total price, it helps to look at each cost component separately.
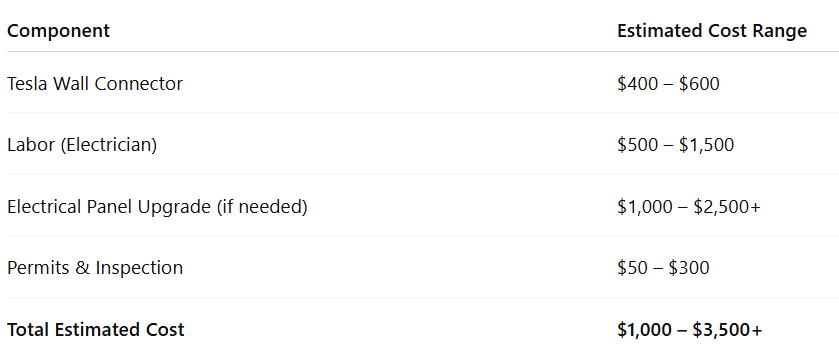
The charger itself is a fixed cost in most cases. However, labor and upgrades can vary widely. For example, if your panel has enough capacity, you can avoid upgrade costs entirely. This keeps the project much more affordable.
Permits are another small but necessary expense. In Tampa, electrical permits ensure the installation meets safety codes. Skipping this step can lead to issues later, especially if you plan to sell your home.
What This Means for Homeowners
For many homeowners, the final cost comes down to one key factor—how ready your home is for EV charging.
If your electrical panel has available capacity and the installation point is nearby, your costs will stay low. However, if upgrades are needed, the price will increase.
Even so, a Tesla Wall Connector is still a long-term investment. It adds convenience, improves charging speed, and can even increase property value in a growing EV market.
What Affects Tesla Wall Connector Installation Cost?
The total cost of installing a Tesla Wall Connector is not the same for every home. While average price ranges are helpful, the final number depends on a few key factors. Understanding these can help you plan better and avoid surprises.
Distance from Electrical Panel
One of the biggest cost factors is the distance between your electrical panel and the charger location.
If your charger is installed right next to the panel, the job is simple. It requires less wiring, less labor, and fewer materials. This keeps costs on the lower end.
However, if the charger is installed farther away—such as on the opposite side of the house—costs increase. Electricians need to run longer वायरिंग, install conduit, and spend more time on the job.
In most cases:
-
Short distance = lower cost
-
Long distance = higher cost
Even an extra 20–30 feet can make a noticeable difference in pricing.
Electrical Panel Capacity
Your electrical panel plays a major role in determining the final cost.
If your panel has enough available capacity, the installation is straightforward. The electrician can add a new breaker and connect the charger without major changes.
But if your panel is already full or outdated, you may need an upgrade. This can add anywhere from $1,000 to $2,500 or more to the total cost.
Older homes in Tampa are more likely to need upgrades. Newer homes, especially those built in the last 10–15 years, are often better prepared for EV charging.
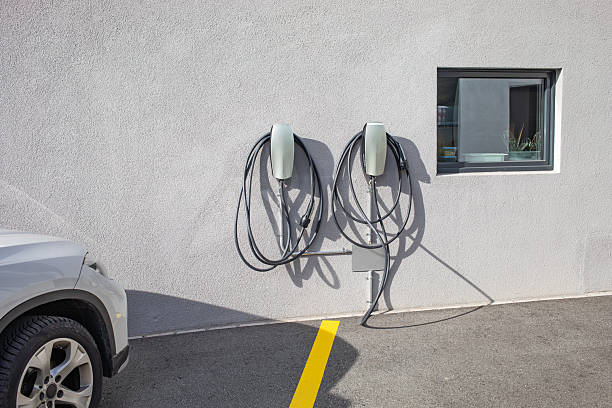
Installation Location (Garage vs Outdoor)
Where you install the charger also affects the price. Garage installations are usually simpler. They are protected from the weather and often closer to the electrical panel.
Outdoor installations, on the other hand, require extra steps:
-
Weatherproof enclosures
-
Proper mounting surfaces
-
Additional conduit protection
These added requirements can increase the cost by $100 to $500, depending on the setup. Still, outdoor installations are common in Tampa, especially for homes without enclosed garages.
Permits and Inspection Requirements in Tampa
In Tampa, permits are required for EV charger installations. This ensures the work meets safety standards and local electrical codes.
Permit costs are usually small, but they are essential. They typically range from $50 to $300. After installation, an inspection may also be required. This step confirms that everything is installed correctly and safely.
Working with a licensed electrician makes this process much easier. They handle permits, schedule inspections, and ensure everything is compliant.
Charger Type (Standard vs Universal Wall Connector)
Not all Wall Connectors are the same. Tesla offers different models, and your choice can affect the overall cost.
- The standard Wall Connector is designed specifically for Tesla vehicles. It is the most common option and usually the most cost-effective.
- The Universal Wall Connector, however, supports both Tesla and non-Tesla EVs. This can be useful for households with multiple vehicle types or future flexibility.
While the price difference is not huge, the universal model may cost slightly more upfront.
Summary of Cost Factors
To keep things simple, here are the main elements that influence your installation cost:
-
Distance from panel
-
Electrical panel capacity
-
Installation location
-
Permit requirements
-
Charger model
Each of these factors adds a layer to the final price. When combined, they determine whether your project stays close to $1,000 or moves toward $3,500 or more.
Tesla Wall Connector vs Other Charging Options
When planning home charging, it helps to compare all available options. While the Tesla Wall Connector is a popular choice, it is not the only one. Each option comes with different costs, speeds, and levels of convenience. Understanding these differences will help you choose the setup that fits your daily driving needs.
Level 1 Charging (Standard Outlet)
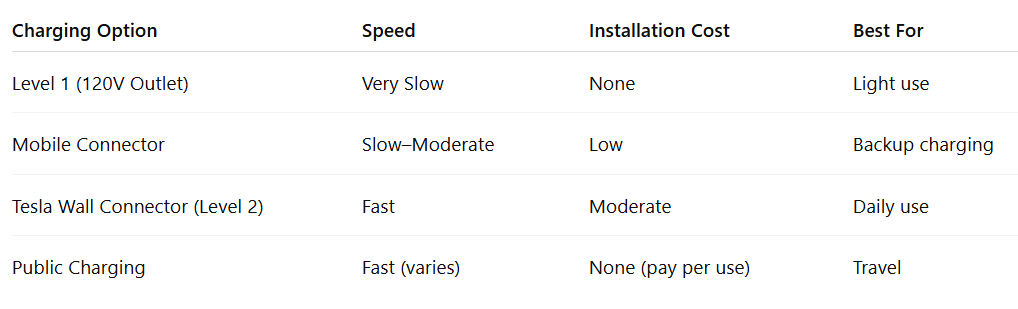
Level 1 charging uses a regular 120-volt household outlet. Every Tesla comes with a mobile connector that works with this setup. The biggest advantage is that there is no installation cost. You simply plug your car into an existing outlet.
However, the charging speed is very slow. Most vehicles gain only 2 to 5 miles of range per hour. This may work for light daily use, but it can become limiting over time.
Level 1 charging is best for:
-
Short commutes
-
Occasional driving
-
Temporary charging setups
For most Tampa homeowners, this option feels too slow for everyday use.
Level 2 Charging (Wall Connector)
Level 2 charging is where the Tesla Wall Connector stands out. It uses a 240-volt connection, similar to large home appliances.
This setup delivers much faster charging. Most Tesla vehicles gain around 25 to 45 miles of range per hour, depending on the configuration.
That means you can fully charge your car overnight without any issues.
Level 2 charging is ideal for:
-
Daily drivers
-
Families with multiple vehicles
-
Long commutes
While it requires installation, the speed and convenience make it the preferred choice for most homeowners.
Mobile Connector vs Wall Connector
Tesla owners often compare the mobile connector with the Wall Connector. The mobile connector is included with the vehicle. It is portable and can plug into different outlets. However, it is not designed for heavy daily use.
The Wall Connector, on the other hand, is a permanent installation. It offers:
-
Faster charging speeds
-
Cleaner cable management
-
Smart connectivity features
-
More reliable long-term performance
While the mobile connector is useful as a backup, most homeowners eventually upgrade to a Wall Connector for everyday charging.
Public Charging vs Home Charging
Public charging stations are available throughout Tampa, including Level 2 and fast-charging options. They are helpful when you are on the road. However, they come with some drawbacks:
-
Waiting time during peak hours
-
Ongoing charging costs
-
Less convenience compared to home charging
Home charging, especially with a Wall Connector, gives you full control. You can charge overnight, avoid lines, and reduce reliance on public infrastructure.
Quick Comparison Table
Which Option Is Right for You?
For most Tesla owners in Tampa, Level 2 charging with a Wall Connector is the most practical choice. It balances speed, convenience, and long-term value.
If you drive daily or rely on your EV as your primary vehicle, a Wall Connector is almost essential. It removes the stress of charging and fits seamlessly into your routine.
Installation Cost Scenarios (Real-World Examples)
Every home is different, so installation costs can vary. However, most projects in Tampa fall into a few common categories. Looking at real-world scenarios can help you estimate where your project might land. Below are three typical installation types for a Tesla Wall Connector.
Basic Installation (Near Electrical Panel)
This is the simplest and most affordable scenario. In this case, the charger is installed close to the electrical panel—often in the garage on the same wall. Since the distance is short, the electrician does not need much wiring or additional materials.
There is also a good chance that your panel already has enough capacity. That means no upgrades are required.
Typical cost range:
-
$950 – $1,200
What’s included:
-
Mounting the Wall Connector
-
Short wiring run
-
New breaker installation
-
Basic permit
Best for:
-
Newer homes
-
Garages with nearby panels
-
Homeowners looking for a budget-friendly setup
This type of installation is quick and can often be completed in just a few hours.
Standard Installation (Moderate Distance)
This is the most common type of installation in Tampa. Here, the charger is placed a bit farther from the panel. For example, it might be installed on the opposite side of the garage or outside near the driveway.
The electrician will need to run additional wiring and possibly install conduit. This increases both labor and material costs.
Typical cost range:
-
$1,200 – $2,000
What’s included:
-
Wall Connector installation
-
Moderate wiring distance
-
Conduit and protective materials
-
Permits and inspection
Best for:
-
Homes with flexible charger placement needs
-
Outdoor installations
-
Average residential setups
This option offers a good balance between cost and convenience.
Complex Installation (Panel Upgrade Required)
This is the most expensive scenario, but it is sometimes necessary. If your electrical panel is full, outdated, or not designed for high loads, an upgrade will be required before installing the charger. This adds both time and cost to the project.
In some cases, the charger location may also be far from the panel, which increases complexity even more.
Typical cost range:
-
$2,500 – $5,000+
What’s included:
-
Electrical panel upgrade or replacement
-
New circuits and breakers
-
Longer wiring runs
-
Full permit and inspection process
Best for:
-
Older homes
-
Homes with limited panel capacity
-
Large properties with long distances between the panel and the charger
While the upfront cost is higher, this upgrade improves your home’s electrical system overall. It also prepares your property for future energy needs.
How to Estimate Your Installation Type
If you are unsure which category your home falls into, here are a few quick indicators:
-
Panel in garage + empty breaker space → Likely basic installation
-
Panel nearby but not adjacent → Likely standard installation
-
Old panel or no capacity → Likely complex installation
The most accurate way to know is through a professional site assessment. A licensed electrician can evaluate your setup and give you a clear estimate.
Why These Scenarios Matter
Understanding these scenarios helps you set realistic expectations. Instead of guessing, you can plan your budget based on your home’s condition.
It also helps you avoid underestimating costs. Many homeowners assume the lowest price, but end up needing additional work. Knowing the possibilities ahead of time makes the process smoother.
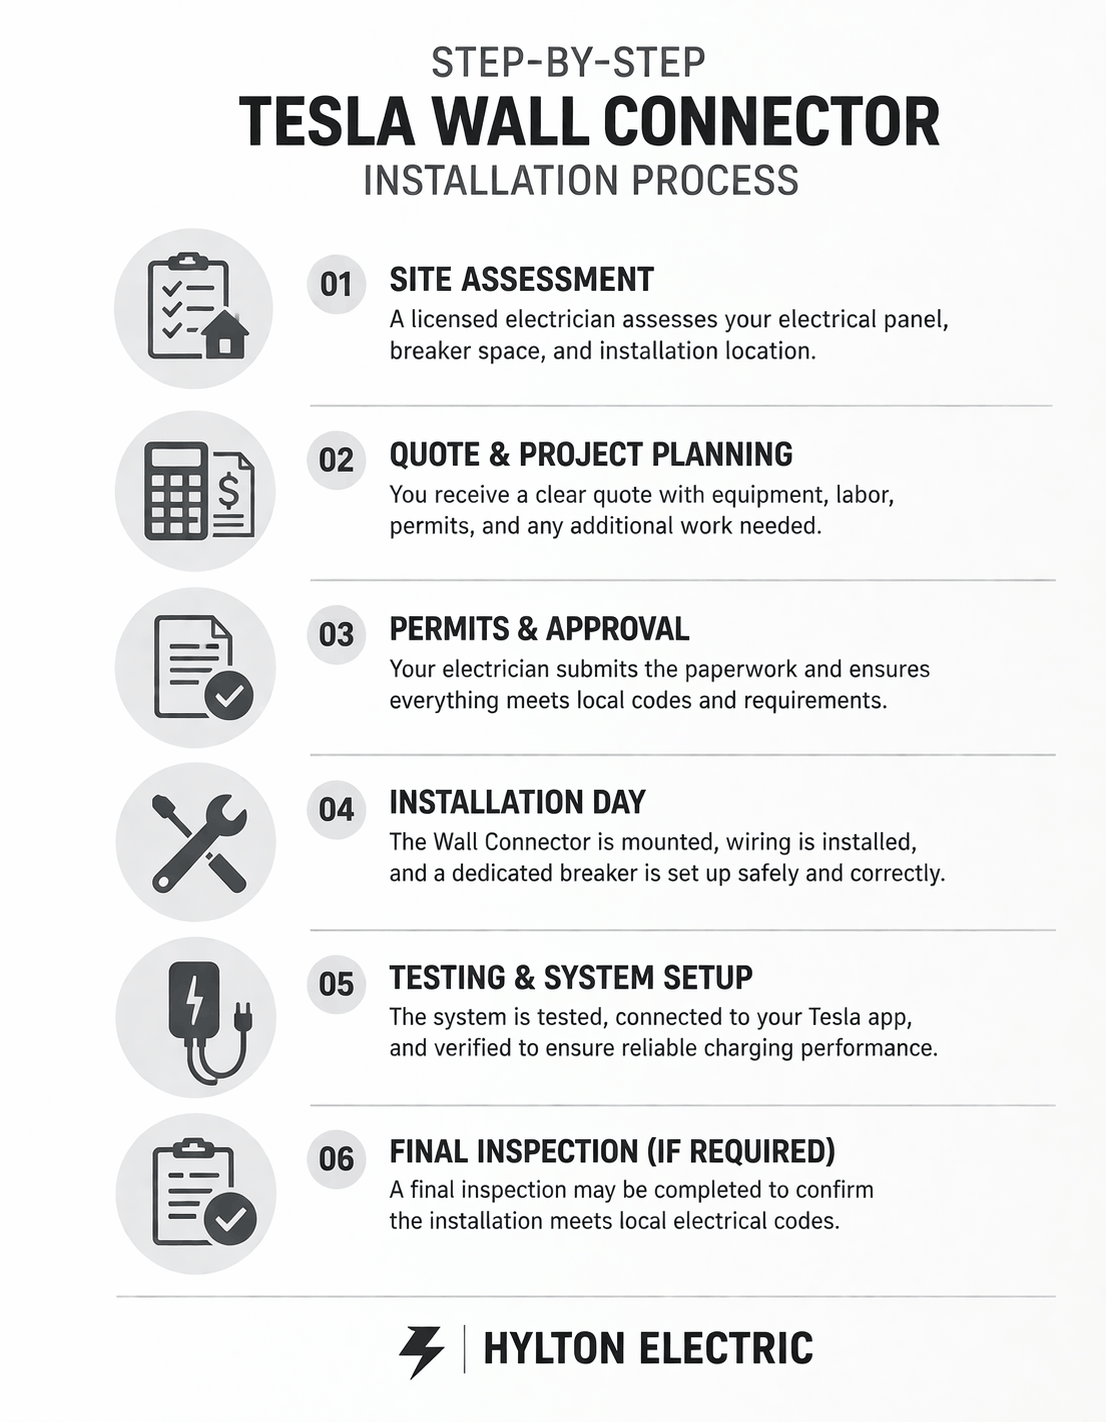
Step-by-Step Tesla Wall Connector Installation Process
Installing a Tesla Wall Connector is a structured process. While each home is different, most installations in Tampa follow a similar sequence. Knowing these steps can help you understand what to expect and how the project moves forward.
Site Assessment
The process starts with a professional assessment of your home.
A licensed electrician will visit your property to evaluate:
-
Electrical panel capacity
-
Available breaker space
-
Distance to the installation location
-
Indoor or outdoor setup requirements
They may also ask about your Tesla model and charging habits. This helps determine the right configuration for your charger. At this stage, potential issues are identified early. For example, if your panel needs an upgrade, you will know upfront.
Quote and Project Planning
After the assessment, you will receive a detailed quote.
This typically includes:
-
Equipment cost
-
Labor charges
-
Permit fees
-
Any additional work, such as panel upgrades
A clear quote helps you avoid unexpected expenses later. It also gives you a chance to adjust the installation location or scope if needed. Good electricians will walk you through the plan and answer any questions before moving forward.
Permits and Approval
In Tampa, permits are required for EV charger installations.
Your electrician usually handles this step. They will:
-
Submit the necessary paperwork
-
Ensure the design meets local codes
-
Schedule inspections if required
This step may take a few days, depending on local processing times. While it can feel like a delay, it is essential for safety and compliance.
Installation Day
Once permits are approved, the installation begins.
On the scheduled day, the electrician will:
-
Mount the Wall Connector
-
Run wiring from the panel to the charger
-
Install a dedicated circuit breaker
-
Set up conduit and protective materials
For simple installations, this process can take just 2 to 4 hours. More complex projects may take a full day or longer. Throughout the process, safety is the top priority. Proper grounding, secure connections, and code compliance are all carefully checked.
Testing and System Setup
After installation, the system is tested.
The electrician will:
-
Power on the charger in
-
Verify voltage and current levels
-
Ensure stable charging performance
You will also be guided through connecting the charger to your Tesla app. This allows you to monitor charging, adjust settings, and track energy usage. Before leaving, the electrician will confirm that everything is working correctly and safely.
Final Inspection (If Required)
In some cases, a final inspection is scheduled by the city. An inspector will review the installation to ensure it meets local electrical codes. Once approved, your installation is officially complete. This step adds peace of mind. It confirms that your system is safe, compliant, and built to last.
What to Expect Overall
From start to finish, the process is usually straightforward.
-
Simple installations: completed within a day
-
Complex installations: may take a few days, including permits
Most of the time, the only waiting period is for permit approval. The actual installation work is relatively quick.
Why Professional Installation Matters
Working with a licensed electrician ensures:
-
Safe and code-compliant installation
-
Proper handling of permits and inspections
-
Reliable long-term performance
It also protects your home and your investment.
Permits, Codes, and Regulations in Tampa, FL
Installing a Tesla Wall Connector is not just about mounting equipment and running wires. In Tampa, there are clear electrical codes and permit requirements that must be followed. These rules are in place to keep your home safe and ensure the installation works properly over time. Understanding these requirements can help you avoid delays, fines, or safety risks.
NEC (National Electrical Code) Requirements
All EV charger installations in the U.S., including Tampa, must follow the National Electrical Code (NEC). The NEC sets the standard for safe electrical design and installation. For EV chargers, it includes rules such as:
-
Dedicated circuit requirements
-
Proper wire sizing based on load
-
Grounding and bonding standards
-
GFCI (Ground Fault Circuit Interrupter) protection
These rules ensure your charger operates safely under continuous load. Since EV charging can run for several hours, safety standards are stricter than for many other appliances. A licensed electrician will always follow NEC guidelines during installation.
Tampa Permit Requirements
In Tampa, an electrical permit is required before installing a Wall Connector.
This process includes:
-
Submitting an application to the local building department
-
Providing installation details
-
Scheduling an inspection after the work is complete
Permit costs are usually modest, but they are mandatory. Skipping this step can lead to penalties or issues when selling your home. Permits also create a record of the work done. This can be helpful for insurance and future property transactions.
Inspection Process
After installation, a city inspector may visit your property.
The purpose of the inspection is to verify:
-
Proper wiring and connections
-
Correct breaker size
-
Safe installation practices
-
Compliance with local and national codes
If everything meets the requirements, the installation is approved. If not, adjustments may be required before approval is granted. While this step may seem formal, it adds an extra layer of protection for homeowners.
GFCI and Safety Compliance
Modern codes require GFCI protection for EV chargers in many cases. This feature helps prevent electrical shock by shutting off power if a fault is detected.
In addition, proper grounding is essential. Without it, the risk of electrical hazards increases. These safety measures may add a small cost to the installation, but they are critical for long-term reliability.
Why Hiring a Licensed Electrician Matters
Working with a licensed electrician is not just recommended—it is essential.
A professional will:
-
Handle permits and paperwork
-
Ensure full code compliance
-
Perform safe and reliable installation
-
Reduce the risk of future issues
Unlicensed work may seem cheaper at first, but it often leads to costly corrections later. It can also create safety risks that are not worth taking.
Local Knowledge Makes a Difference
Electricians who work in Tampa regularly understand local requirements. They know how to:
-
Speed up permit approvals
-
Avoid common code violations
-
Ensure smooth inspections
This local experience can save you time and prevent unnecessary delays.
Key Takeaway
Permits and codes may seem like small details, but they play a major role in your installation.
Following the proper process ensures:
-
Safety for your home and family
-
Compliance with local laws
-
Long-term performance of your charger
Rebates, Incentives, and Tax Credits in Florida (2026)
Installing a Tesla Wall Connector is an investment, but there are ways to reduce the overall cost. Many homeowners in Tampa are not aware of the incentives available to them. These programs can lower your upfront expenses and improve your return over time. Below are the main financial incentives you should know about in 2026.
Federal EV Charger Tax Credit (Section 30C)
The federal government offers a tax credit for EV charger installations under Section 30C.
This credit allows you to claim:
-
30% of the total installation cost
-
Up to a maximum of $1,000 for residential properties
This means if your total installation cost is $2,500, you could receive up to $750 back as a tax credit.
However, there are a few important points:
-
The installation must meet eligibility requirements
-
It must be installed at your primary residence
-
You need to keep receipts and documentation
This credit directly reduces your tax liability, making it one of the most valuable incentives available.
Utility Rebates in Florida
Some utility companies in Florida offer rebates or special programs for EV charging.
Depending on your provider, you may receive:
-
$200 to $500 in rebates
-
Time-of-use (TOU) plans with lower nighttime rates
-
Incentives for energy-efficient installations
These programs vary by location, so it is important to check with your local utility provider in Tampa.
Even if a direct rebate is not available, reduced electricity rates during off-peak hours can still lower your long-term charging costs.
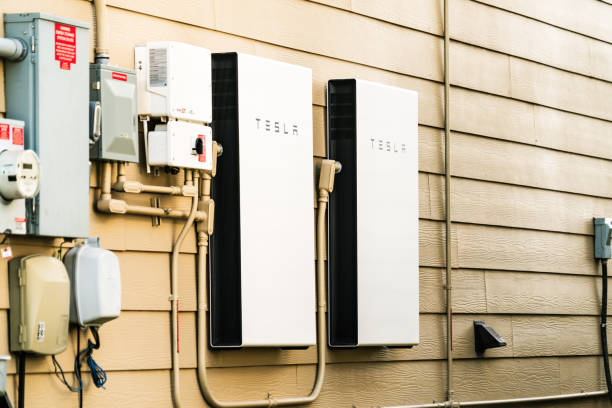
Programs Like FPL EVolution Home
Florida Power & Light (FPL) offers a program called EVolution Home for eligible customers.
This program can include:
-
Installation of a Level 2 charger
-
Maintenance and support
-
A fixed monthly fee instead of upfront costs
For some homeowners, this option removes the need for a large initial investment. Instead, you pay over time while still enjoying the benefits of home charging. It is a good option for those who prefer predictable monthly expenses.
Local and State Incentives (What to Expect)
Florida does not always offer statewide rebates for EV chargers, but programs can change over time.
Occasionally, you may find:
-
Local city-based incentives
-
Pilot programs for EV adoption
-
Limited-time rebates from energy providers
Because these offers can change, it is a good idea to check for updates before starting your installation.
How Much Can You Actually Save?
Here is a simple example:
-
Installation cost: $2,500
-
Federal tax credit (30%): –$750
-
Utility rebate (estimated): –$300
Final effective cost: $1,450
This shows how incentives can significantly reduce your total expense.
Tips to Maximize Your Savings
To get the most value from available incentives:
-
Keep all receipts and invoices
-
Confirm eligibility before installation
-
Work with a licensed electrician familiar with rebate programs
-
Check utility websites for current offers
Planning ahead ensures you do not miss out on available savings.
Why Incentives Matter
These programs make EV ownership more affordable. They also encourage homeowners to switch to cleaner transportation options. Even if the upfront cost seems high, incentives can bring it down to a much more manageable level.
How Long Does Tesla Wall Connector Installation Take?
Installing a Tesla Wall Connector is usually a quick process. However, the total timeline can vary depending on your home and the complexity of the project. Understanding the timeline helps you plan better and avoid unexpected delays.
Typical Installation Timeline
For most Tampa homes, the actual installation is completed in a single visit.
-
Basic installations: 2 to 4 hours
-
Standard installations: 4 to 6 hours
-
Complex installations: 6 hours to 1 full day (or more if upgrades are needed)
If no major electrical work is required, the process is straightforward. The electrician arrives, installs the charger, tests the system, and you are ready to use it the same day.
Permit and Scheduling Time
While installation itself is fast, permits can add extra time.
In Tampa, the process may include:
-
Permit approval: 1 to 5 business days
-
Scheduling the electrician: 1 to 3 days, depending on availability
-
Inspection (if required): 1 to 3 days after installation
Because of this, the full timeline from start to finish is usually 3 to 10 days. Planning ahead can help reduce waiting time, especially during busy seasons.
Delays to Watch For
Most installations go smoothly, but a few factors can cause delays:
-
Electrical panel upgrades: May require additional work and scheduling
-
Permit backlogs: Busy periods can slow approvals
-
Material availability: Special parts or longer वायरिंग runs
-
Weather (for outdoor installs): Rain can delay certain steps
These delays are not common, but they are worth considering when planning your project.
Same-Day vs Multi-Day Projects
Here is a simple way to understand the difference:
-
Same-day installation:
-
Charger near panel
-
No upgrades needed
-
Minimal wiring
-
-
Multi-day project:
-
Panel upgrade required
-
Long-distance wiring
-
Complex layout
-
Most homeowners in Tampa fall into the same-day category, especially in newer homes.
How to Speed Up the Process
If you want a faster installation, a few simple steps can help:
-
Schedule a site assessment early
-
Choose a charger location close to the panel
-
Ensure clear access to the work area
-
Work with a licensed local electrician
These steps reduce complications and help the project move smoothly.
What to Expect Overall
From the first consultation to final setup, most installations are completed within a week. The actual work is quick, but permits and scheduling add some time. Once installed, your charger is ready to use immediately. There is no long waiting period after completion.
Why Timing Matters
Knowing the timeline helps you plan around your schedule. It also ensures your home is ready when you need it—especially if you recently purchased a Tesla or are planning to.
DIY vs Professional Tesla Charger Installation
When planning your Tesla Wall Connector setup, you may wonder if you can install it yourself. While DIY projects can save money in some cases, EV charger installation is different. It involves high-voltage electrical work, strict codes, and safety risks.
Let’s break down both options so you can make the right decision.
Why DIY Installation Is Not Recommended
At first glance, installing a charger may seem simple. However, it requires working directly with your home’s electrical system.
Some of the risks include:
-
Incorrect wiring, which can lead to fire hazards
-
Overloading your electrical panel
-
Failing to meet local code requirements
-
Voiding equipment warranties
EV chargers draw a continuous high load for several hours. If the installation is not done correctly, it can create serious long-term issues.
In Tampa, permits and inspections are also required. DIY installations often fail inspections or require rework, which increases overall costs.
What a Professional Electrician Does
A licensed electrician brings experience and technical knowledge to the job.
They handle:
-
Load calculations to ensure your panel can support the charger
-
Proper wire sizing and breaker selection
-
Safe grounding and GFCI protection
-
Permit applications and inspections
They also follow all local and national codes, which ensures your installation is safe and compliant.
Safety Comes First
Electrical work is not just about getting the charger to work. It is about making sure it works safely every day.
A professional installation reduces the risk of:
-
Electrical fires
-
System failures
-
Damage to your vehicle or charger
This is especially important for equipment like a Wall Connector, which is used frequently and for long charging sessions.
Cost Comparison: DIY vs Professional
Some homeowners consider DIY to save on labor costs. However, the actual savings are often limited.
Here is why:
-
You still need to purchase materials and tools
-
Permit fees still apply
-
Mistakes can lead to expensive repairs
In many cases, fixing a poor installation costs more than hiring a professional from the start.
Code Compliance and Inspections
In Tampa, electrical work must pass inspection.
A licensed electrician ensures:
-
All work meets NEC standards
-
Local permit requirements are followed
-
The installation passes inspection the first time
DIY work may not meet these standards, which can delay your project.
Long-Term Reliability
A professionally installed charger is more reliable over time.
You can expect:
-
Consistent charging performance
-
Fewer maintenance issues
-
Proper system integration with your home
This is important if you plan to use your EV daily.
When (If Ever) DIY Might Make Sense
In most cases, DIY is not recommended. However, minor tasks like mounting the unit or preparing the space may be possible if guided by a professional. Even then, all electrical connections should be handled by a licensed electrician.
Final Verdict
While DIY may seem appealing, EV charger installation is not the place to cut corners. The risks outweigh the savings.
Hiring a professional ensures:
-
Safety
-
Code compliance
-
Reliable performance
It also gives you peace of mind knowing the job is done right.
Cost-Saving Tips for Tesla Wall Connector Installation
Installing a Tesla Wall Connector is a valuable upgrade, but that does not mean you have to overspend. With the right approach, you can reduce costs while still getting a safe and reliable installation.
Here are practical ways to keep your project within budget.
Install the Charger Near the Electrical Panel
One of the easiest ways to save money is by choosing the right location.
The closer your charger is to the electrical panel, the lower your costs will be. Shorter distances mean:
-
Less wiring
-
Less conduit
-
Less labor time
Even a small change in placement can reduce your total cost by a few hundred dollars. If possible, install the charger in the garage near the panel. This is usually the most cost-effective option.
Avoid Unnecessary Panel Upgrades
Panel upgrades can be expensive, so it is worth checking if you truly need one.
A licensed electrician can:
-
Evaluate your current panel capacity
-
Perform load calculations
-
Suggest alternatives if space is limited
In some cases, load management solutions can help you avoid a full upgrade. This keeps your installation much more affordable.
Get Multiple Quotes
Prices can vary between electricians, even within the same area.
Getting 2–3 quotes allows you to:
-
Compare pricing
-
Understand what is included
-
Identify unusually high or low estimates
However, do not choose based on price alone. Make sure the electrician is licensed and experienced with EV charger installations.
Take Advantage of Rebates and Tax Credits
As discussed earlier, incentives can significantly reduce your total cost.
Make sure to:
-
Apply for the federal tax credit
-
Check local utility rebates
-
Ask your electrician about available programs
These savings can lower your effective cost by hundreds of dollars.
Plan the Installation in Advance
Last-minute installations can sometimes cost more, especially if you need urgent service.
Planning ahead allows you to:
-
Schedule during normal working hours
-
Avoid rush fees
-
Take time to compare options
It also gives you time to prepare your home, which can reduce labor time.
Prepare the Installation Area
Before the electrician arrives, make sure the work area is easily accessible.
Simple steps include:
-
Clearing space near the panel
-
Removing obstacles in the garage
-
Ensuring easy access to the installation location
This helps the electrician work faster, which can reduce labor costs.
Choose the Right Charger Model
While most homeowners choose the standard Wall Connector, it is still worth confirming your needs. If you do not require multi-vehicle compatibility, a basic setup may be enough. Avoid paying extra for features you may not use.
Bundle Electrical Work
If you are planning other electrical upgrades—such as panel replacement or additional circuits—it may be more cost-effective to do everything at once.
Bundling work can:
-
Reduce labor costs
-
Minimize repeat visits
-
Improve overall efficiency
This approach is especially useful for older homes.
Focus on Long-Term Value
While saving money is important, the lowest price is not always the best choice.
A properly installed charger will:
-
Last longer
-
Perform better
-
Require fewer repairs
Spending a little more upfront for quality work can save money over time.
Key Takeaway
Reducing installation costs is all about smart planning. Small decisions—like choosing the right location or applying for incentives—can make a big difference. By following these tips, you can keep your project affordable without compromising safety or performance.
Leave a Reply